Monday, August 27, 2018

efficient workshop lighting 2

Lighting a work area in a pleasant, safe and efficient manner is about more than just changing light bulbs. I have changed some bulbs, added a few, tried new LED plug in florescent replacements and cleaned the rest. Big improvements! Low cost once you have modern electronic ballasts. Re-use the existing steel box which is often superior to what you'd buy new.

This is a view of my fabrication shop with ALL the lights on. [click any pic to enlarge] The lights in this room are almost NEVER All On. One of my principles of efficient lighting is to only use what I need. I have five lighting "zones" in this one room so I can have the amount and location of lighting that I need.

I switch my lights manually and I am pretty good at remembering to turn off when I leave the room. I tried motion sensing switches but they annoy me. None of these lights are network controllable, all are manual!

When I arrived here five years ago, there were four dual 40 watt T12 florescent lights on the ceiling switchable in two banks. The lights were along the sides of the room. The lamp fixtures were old and some of the lamps didn't work. Some of the fixtures had already been reused and were painted deep red.

Switching on the lights caused interference on my FM radio. See exploring efficient workshop lighting alternatives The title picture is approximately the same view as this article, five years ago (called P2 on the plan below).
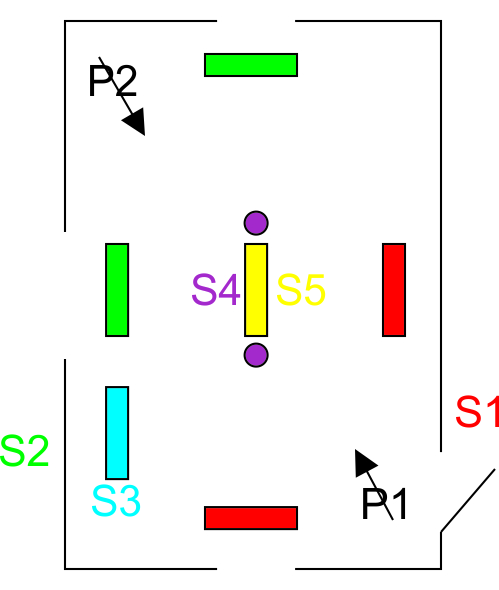
Those four fixtures are in the same places (the green and the red banks) but they are now completely rebuilt with new electronic ballasts, new T8 32watt lamps and new lamp mounting posts.

Originally, there was no light in the center of the room. I added a circuit to the panel for an "island" in the center of the workshop ceiling with switchable lights (purple and yellow on the diagram) and a hanging power pendant. Both the lights are controlled with pull switches. Yellow is a High Output (HO) dual 50 watt T5 florescent (100 watt total) and purple are two LED bulbs, each 10watts (20 watt total).

The two LED bulbs provide the lowest level of illumination in the room at a cost of only 20 watts. Perfectly adequate basic illumination from two points near the center of the room.

Later, I added another pull chain controlled dual four foot 32watt T8 fixture over another bench in the bottom corner (blue). This is the fixture I used for the test below.

At move-in the ceiling was dirty white. I painted the ceiling with two coats of pure white latex in patches as I removed fixtures for rebuilding. Now, after four years, the ceiling is again turning a dirty white but not as bad as it was. I should probably repaint it.

Taking down and cleaning the now four year old T8 bulbs has made a huge difference in the room brightness.

The lamp showing the lettering was facing down, the other one is showing the "up" side, the side you normally don't see, the side facing the fixture. The accumulated dirt/dust cuts down the amount of light leaving half of the lamp.

Cleaning! So simple yet so effective! A lot of climbing the ladder in the last two days as I inspected and cleaned the eight fixtures that are now on the ceiling.

I also tried two new LED "instant replacements".

From Philips "InstantFit T8 LED, C$12 each at Home Depot. I bought one each of "daylight" (6000K) and cool white (5000K) so I could compare them. I had intended to buy two of the 6000K and that is what I will end up with since I have decided to return the 5000K after trying it out. The Philips 6000K seems subjectively brighter to me in my shop environment.

I bought Philips 32W replacement LED lamps a couple years ago and have been using them in the paint area. I have been pleased with them, judging them to be similar brightness to 32W fluorescent lamps but instantly full bright but twice the price. I believe two years ago, the Philips LED lamps were on sale at C$30.

I notice that now, the Philips lamps are glass. The earlier ones were encased in a plastic tube which would bend just slightly. The new Philips tubes also have lots of warning labels including about fire hazard. Perhaps the glass is needed for high temperatures? The lamps certainly do get warm, almost as warm as florescent.
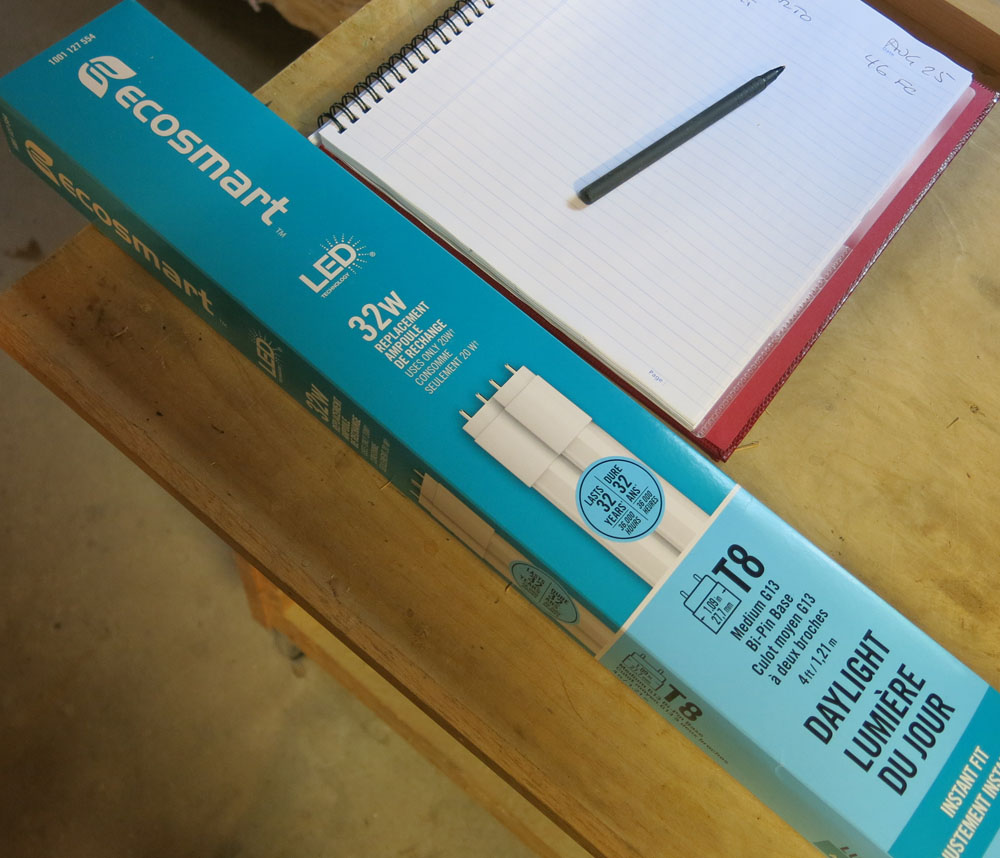
The second type I tested was from Ecosmart, their 32W LED replacement (rated 20w each lamp), two in a pack for C$15 also at HD. Also glass. Far less warning info. Very bright!

Curiously, Ecosmart calls their bulbs "daylight" at 5000K. The naming of color temperature is a bit of a wild west I think, the degrees Kelvin should be a better guide or actually comparing in your own environment. Some time ago I did a piece on comparing conventional, compact florescent and LED bulbs and compared some of the visual effect of different color temperatures.

I installed the Philips and the Ecosmart bulbs in several different fixtures here but made measurements at bench height from the blue fixture


Comparison of lamp types
LampBrightness FCTemp (5 min)
Philips ALTO 32w florescent4635C
Ecosmart 20w LED5233C
Philips 17w LED36.526C

The Philips are not as bright as my typical T8 florescent. The Ecosmart is the brightest. The Ecosmart uses less power than the florescent, but more than the Philips LED.

Temperature was measured with an infrared temperature meter. Brightness was measured with a footcandle meter.

One detail of the comparison is that the LEDs came to full brightness immediately whereas the florescent takes several minutes to come to full brightness. Even longer at near zero temperatures. So the LED has a real advantage in my shop in winter.

Another detail is that general ceiling lighting is good for benchtop brighness but several of the machines, even with light fixtures directly over them, regardless of lamp type, need work lights ahead of the blade since the machine itself shields some of the overhead light. The band saw and the radial arm saw are examples that will need more attention for better safety.

Thank you for your interest,

George Plhak
Lions Head, Ontario, Canada

shop lighting reading list
a parabolic workshop light
led household bulbs
exploring efficient workshop lighting alternatives
work light led retrofit
testing fluorescent light fixtures - the test jig
testing fluorescent light fixtures - the test method (video)
testing fluorescent fixtures - 40 watt
efficient workshop lighting 2 (this article)
updated bench lighting

Tuesday, August 14, 2018

what's an oscilloscope?

I had a couple guys here installing a high tech propane house furnace. Renovations also going on. The house is chaos. I had my Tektronix 7854 and 7L5 in the living room on the cart. One guy asks what it is? I reply the first oscilloscope with a computer. What's an oscilloscope? he asks. It lets you see electricity I replied. He seemed happy with that. Age about 40. What's an oscilloscope?

Thanks for your interest.

George Plhak
Lions Head, Ontario, Canada

Wednesday, July 25, 2018

dehumidifier

INDEX to the series

I have added a small portable dehumidifier in the basement. So far, it makes lots of water and uses a ton of electricity.

After setting up the new freezer in the basement last week, I noticed that there was condensation - ice and water drops - more than a bit - in the area of the door seal and a coating of condensed liquid water mist on the front surface of the appliance.

This was not a surprise. The old freezer used to "sweat" in summer when the air humidity was high. Perched on 2x4s, the old freezer lived over a perpetual water pond. It's top lid was covered with condensation that ran down whenever it was opened. This water was constantly recycled within the basement, no possibility of escape.

I don't have air conditioning in the house. The freezer is much colder than anything in the basement so acts like a magnet for water in the air. I keep the basement door shut and the one window does not open so the basement is relatively shut off from the outside. Mine is an old house and there have been and perhaps still are water problems. Would I be able to dry out the basement at a reasonable energy cost? I had a dehumidifier but haven't used it. I decided to try running it to see the effect on the freezer external condensation.

The old Danby dehumidifier roared into action but unfortunately did not work. No water appeared in the unit after an hour. It made cycling noises and clicks and drew high power for a second and then nothing but the fan running. It was behaving as if the compressor wasn't starting. I took it to recycling and paid $35 to deal with the Freon.

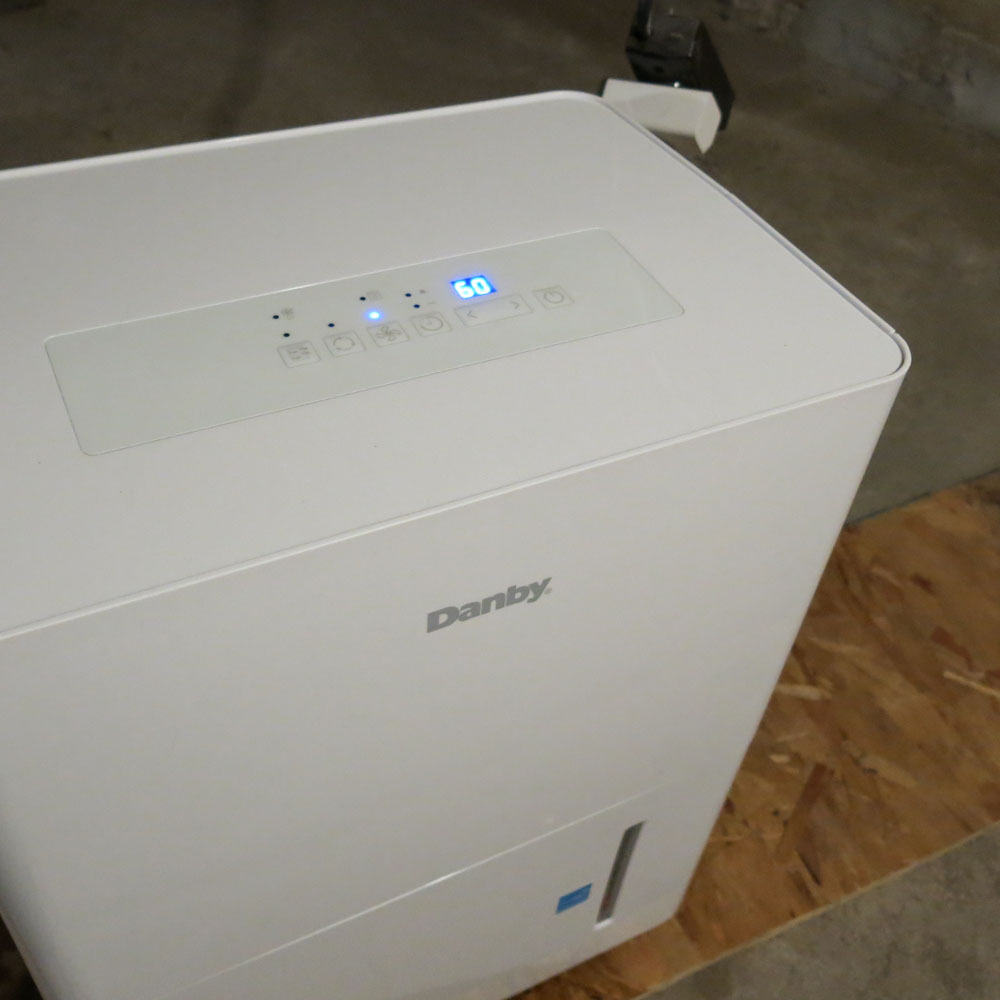
So I bought a new mid size portable dehumidifier, a Danby DDR045BBCWDB 21L / 45 US pint rated for areas up to 2500 sq ft "depending on conditions". My home is approx 1250 sq feet by the real estate definition yet I am more concerned with the basement space which might be 1000 sq ft including the crawl spaces, none of which are included in the real estate definition. So I might be overpowered with the model I chose.

Danby shows the Energy Star logo on the product and packaging. Uses R410A refrigerant. Very slick appearance. Does not deserve to be on my basement floor.

Following are some reactions and observations based on a couple of days only.

I set it up first on the kitchen table the better to admire it and learn. This is really a nicely finished product. Made in China. Lighter than the 20 year old metal cased unit it replaces, this one is almost entirely plastic. Almost everything you see on the outside, the removable bucket and what you can see inside is made from plastic. There must be metal inside in the compressor and coils. I was tempted to lift the cover but I didn't.

The instructions warn that the unit may not start when you push the power switch the first time and mine did not. I feared that I may not be able to inhibit the running of the unit during peak pricing periods as I had hoped to do, using my preferred outlet switch/energy monitor Itead Sonoff S31. When power was applied to this dehumidifier, it justs sit there until the power button is pushed. Someone has to start it manually. It is smart. It has a computer inside! A line in the data sheet says "Auto Restart: unit automatically restarts after a power failure" so there is hope. I haven't tried yet to interrupt line power with the S31.

The purpose of the dehumidifier was accomplished. After about ten hours running continuously, the condensation on the new freezer reduced and in another ten hours or so, after a bucket or two of water was produced, the freezer shows NO condensation on the outside or around the door seals at all.

A LOT of water is produced. In just over a day and a half, I have removed three large buckets of water from the basement! That's a bucket every 12 hours or so. To get an almost full bucket, I empty the dehumidifier "bucket" into the larger bucket about three times.

There is no drain in my basement so carrying the large bucket once is preferable to carrying the internal bucket upstairs three times. The water goes into a toilet upstairs and hence out of the house. I have a "sump" in the basement floor but dumping the water there would be equivalent to pouring it on the floor. Water has to leave the basement and the house to be removed effectively from the air.

The unit will discharge some water when the internal bucket is removed so I don't want to go far with it. I am also finding removal/insertion of the unit's bucket a bit troublesome at ground level so I am thinking of raising it up somehow with a stand and tray for water spills.

So far I have used 12 kWh as I can see from the S31 to which it is connected. That is a lot of energy and makes my humidifier potentially a major appliance, at least in the summer.

It averages about 400 watts with the fan set to run FULL. I was surprised and I hope that sometime soon it reaches an equilibrium so that the unit does not run all the time. I think I have it set to 50% relative humidity.

When first started in the basement, the display was about 75 so I am guessing this is the RH that is measured? When I push the left right buttons, the display changes to the set point value and jumps 5% steps with each button push. Danby recommends 45-50% so I am starting with that and letting it run 24/7.

So here is a little calculation based on three buckets of water and 12 kWh used. I don't think it is quite right and it certainly is very approximate. Your feedback is welcome.

The Latent Heat of Vaporization - the input energy required to change the state from liquid/vapor at a constant temperature - for water 2260 KJ/kg

Using 12 kWh is equivalent to 43200 kilo-joules. Should be enough energy to evaporate or condense 43200/2260 = 19.12 kg of H2O

1 L of H2O = 1 kg

So 19 L of water is about 5 US Gallons

My 3 buckets each weighed about 9.1 kg. The empty bucket weight was 0.7 kg. Use 9.1 - 0.7 = 8.4 kg H2O per bucket

Total 3 x 8.4 L - 25.2 L

So I got more water than I should have, by about 25%?

One thing I know is not correct is that the Latent heat of Vaporization at 1 atmosphere should work at 100 degrees C and there is no way the Danby has heated the water to the boiling point. I need to learn more about humidifiers and how the Energy Star rating is applied. I did not receive an EnerGuide card in the box nor can I see one on the Danby website.

The temperature of the basement seems to be rising slightly, about 2-3 degrees C since I started running this dehumidifier test, probably because of dumping in excess of 12 kWh into the basement air?

Another benefit of lowered air humidity might be reduced ice buildup inside the freezer. Every time I open the lid, the freezer receives a blast of moist air from the basement. If the air is dryer, less ice will form inside on the walls.

Thanks for your interest.

George Plhak
Lions Head, Ontario, Canada

PS - the Itead ewelink S31 display for the dehumidifier only shows a couple of days and the total. I notice that the app now says kWh where before it showed the degree symbol. Progress is being made at Itead!

PPS - near drought conditions here so I am watering the garden plants with the recovered water rather than putting it down the toilet, even though it is distilled water and thereby lacking minerals. I am sure the plants won't mind.

INDEX to the series