 Winter is coming here in southern Ontario. The leaves are changing colour and soon will start to fall from the trees. Our swimming pool must be closed up for the winter. The tracking parabolic solar heater project that has been under construction here this summer didn't add any BTUs to the pool during September, although it did give us heat earlier.
In the picture (which enlarges if you click it) you can see the ends of the copper collector pipes which require connecting together. On the ground behind are two unmounted reflectors which are waiting for their copper collector pipes.
My goal in this project is to use readily available materials, such as would be available at the typical home center "box stores" that seem to be everywhere now. I was mulling over the type of copper collector to use.
I've decided to go with the L-type copper pipe. In my case, I'm using standard 1-1/2 inch size, (North American Schedule 40 size plumbing pipe). You will probably have to visit a plumbing supply since the box stores only seem to carry the DWV (drain waste vent) type of copper. L-type is approved for hot water and is about twice the wall thickness and price, but probably worth it in durability. If you want to use a different size, you can by changing only the size of the drilled holes in the support plates and the size of the clamps that fix each pipe to the frame.
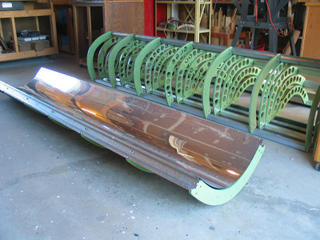
 The last of the six reflectors is about to be assembled. You'll notice that I've added large holes to the ribs to cut down on weight. The ribs aren't very heavy but the holes help improve the balance axially around the collector pipe. Better balance means the motor doesn't have to work as hard to move the reflector to follow the sun. The balance currently is such that the reflectors naturally pivot to the horizontal position seen in the first picture in the absence of the drive motor.
In the parts laid out on the floor, you'll see the seven ribs that make up a single eight foot collector unit, the two side rails that join them together and the screws that that secure the ribs to the rails (four sets times seven ribs). I didn't get the large holes into all of the ribs before painting.
 Here I've snapped in place the reflector sheet, but haven't yet tightened the screws. It helps a lot to have a relatively flat surface to work on and it would be great if I had an eight foot long table available since it takes a while to line eveything up.
Once the reflector material is held within the rails, it forms a curved shape which when tightened down with the screws presses quite nicely against the parabollic shape of the inside curve of the ribs.
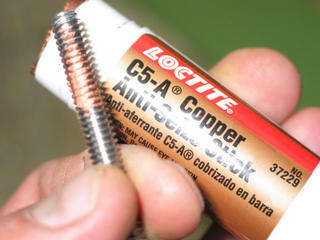
 The screws are each getting a dab of anti-seize compound appied to the threads before assembly. The screws are stainless steel but the mating nuts are plain steel and rust quite rapidly once outside.

No comments:
Post a Comment
Your comment will not appear until approved.
I will read your comment and respond to it if I can.
I do not post anonymous comments or links to products that are not relevant.
Thank you. George.