LED lamp strings can be repaired. It can be as simple as replacing one failed bulb but can be more complex. Often it is not easy.
Early preventative maintenance, a dab of grease into each socket when new will help prevent corrosion caused failures. These strings could last much longer if the manufacturers did this for us at minimal cost. But you can do it yourself. Keep these strings running and out of the landfill.
**NEW** Mar 12 2020 Please see the Addendum for some updates and new pictures.
Don't LED lights last forever?
Apparently not, particularly when used outside.
Winter is very damp here in Canada. Water gets into everything, including supposedly sealed outdoor lighting. The water causes the LED leads to corrode and fail. This corrosion failure of LEDs due to water can be completely and easily stopped with a dab of grease, if caught early.
Failed bulbs that you can see should be replaced promptly since they cause the rest of the string to be under more stress and may lead to more failures. I had the kind of failed bulb that prevented the whole string from lighting. Both kinds of failure can occur.
Like most of us, I bought into the LED low power and eco friendly thing a couple of years ago. I threw out the old filament bulb outdoor Christmas lights and bought new GE branded outdoor LED string lights.
Yesterday, while getting ready to put up the Christmas lights, I found that two out of eight strings did not work. Each has 25 LEDs. I spent part of the day exploring why those had failed and putting up the rest. Fortunately I had tried them before putting them up!
(click any pic to enlarge it)
My GE strings are supposed to be repairable. They come with instructions (the full copy, a pdf) and spare LEDs.
The worst part about my two failed strings was that none of the bulbs lit up. Not one or two bulbs that weren't on while the rest worked. The failed bulb could not be seen since it kept all the others from lighting. This meant that each bulb had to be pulled and a working bulb inserted (according to the manufacturer's instructions).
I thought that we had abandoned series wired light strings back in the 60s? Series wiring is back with LED lights!
I can remember my dad back in the day proudly showing off a new parallel wired string, with which one failed bulb would not darken the whole string. He had spent many a time finding a failed bulb in a dead string so he knew the advantage of parallel wiring. From then until now, the advent of LED lighting, most of our filament bulb lighting strings were wired in parallel.
Series wiring is back with LED lights! It turns out that there is a technical reason why LEDs need to be wired in series and this will be discussed below. Since they are wired in series, I need to check every LED bulb if none of the string lights. Any one of the LEDs could be open circuit.
There are 25 LEDs in each string so that is 25 decorative caps to pull off and then 25 LEDs to pull out. Some of the caps come off easily, others do not. I found that a drop of WD40 helped free some of the stubborn caps. I dripped the lubricant onto the joint between the cap and the socket.
Some of the caps broke when I pulled them off, usually a part of the sealing ring was left in the socket. I dug out the debris from the socket and discarded those caps and replaced them with spares from the scrap strings. The caps are keyed and only fit on one way. Why they did this I am not sure.
I admired the first class molded parts that made up the socket assembly including the LED holder, the cap and the base. There was no flash and the parts fit together very exactly and securely with a snap. With ideal plastic that did not weather or change dimensions or properties with UV and temperature, these would be really nice parts. After a couple years outside, some are harder to get apart than others.
Pulling out the LEDs was sometimes problematic. I used my fingernails inserted in a small groove between the LED and socket and just pulled. Here also, a bit of lubrication from the dielectric grease helped with subsequent removals.
Throughout all this pulling on the socket, I tried not to pull on the wires. They seem securely crimped into the terminals but I thought it best not to pull too hard on them. The terminals are a potential point of failure so while the LED was out of the socket I took a look at the joint with the wires and the condition of the terminals before dabbing the grease and re-inserting the bulb. The inner (insert) portion of the socket can be removed and that will be described below. I found it was desirable to remove the insert on those where corrosion was seen in the socket.
It's about RUST
The cause of my failures was common corrosion. Each LED is itself encased in clear plastic but the metal leads that form it's connection with the socket are made of iron or steel and these leads rust if exposed to water and oxygen. The socket weatherproofing can be improved with a dab of dielectric grease to prevent the oxygen and water from reaching the point where two dissimilar metals touch: the LED lead (iron) and the socket contact (some other metal). Why wouldn't the manufacturer do that?
If I doubted that the LED leads were ferrous, here is a picture of the rusted ones stuck to a small magnet. You can see a broken off LED lead in the foreground.
I have opened all the bulbs on three of my LED strings so far. One that I scrapped had a high percentage of failed bulbs 8 out of the 25. Another that I did not scrap had only one of these problem bulbs. All of these bulbs failed because the LED leads rusted. Some of the LED leads had fallen off or rusted completely through.
Probably millions of these string lights will end up in the landfill over the next few years because people will give up on them. Hopefully you can use some of these ideas to help you to locate the problems with your own and keep them going for a few more years.
Understanding how LED string lights work You do not have to cut the LED string apart and unwind it as I did here but it helped my understanding of how the thing was put together and I am going to use this picture to explain what I found.
Parallel wired light strings have two wires down the length of the string and each lamp is wired between the pair of wires. These LED strings have three wires down the length. It is a little difficult to see what is going on unless you do what I did with a string that was damaged beyond repair. I separated the string into two parts by clipping at only one point. I could then unwind the string into it's two sections as revealed in the picture above.
This is a schematic of my LED string. I clipped the wire at the bottom of the canister. The center portion, the string of LEDs, can then be separated from what I've called the extension cord portion. You can see in the schematic, the wires across the very top and bottom connect the plug at one end to the socket at the other. The series string of LEDs is inter-wound, but is separate from, the extension cord except at the very ends where the LED string and the canister join the circuit, across the two hot leads.
So you can see the LEDs are all in a string and that if any of the LEDs fails open, the current flow in the string will be interrupted and the entire string will be dark. Unlike filament bulbs which rarely fail shorted LEDs can fail in this way. No light is produced yet current continues to flow through the LED. It is thus easy to see which LED failed since it will be the dark one.
It is interesting that in the GE instructions, they seem to presume that the LEDs will fail short and you should look for dark ones and replace them. This was not my experience. All of my failures were failed open circuit, due to rust.
I sacrificed two of the canisters to dissection for the cause of this project. You can see that my method improved after I learned to cut through the cover sheath at the joints of the inner cylinder. There are two 2000 ohm 1 watt resistors and a diode wired in series on a three section frame. Kind of a clever thing. No signs of water ingress with either one, unlike with about 10-20% of the lamp sockets. But I had to look to see what was in here.
I'd like to point out the excellent writing of Terry Ritter "LED Christmas Lights and How to Fix Them". Terry has been down this road and he writes about how LED strings work and what he learned with strings made by Philips. These I have from GE seem very similar.
Terry describes that the LEDs are arranged in series strings because they do not tolerate high voltage well. The voltage that comes from a wall plug (120VAC in North America) is high voltage to an LED which normally operates from a few volts - 3.1 volts in the case of my white LEDs. By stacking 25 of them in a string, each LED drops 3.1 volts so the total voltage drop across the LED string is 77.5 volts. The resistors in the canister are used to drop the remainder (120 - 77.5 = 42.5 volts).
Interestingly, if LEDs fail short, they increase the voltage drop on all the other components in the series circuit so the resistors get hotter and all the other LEDs pass more current. So you can see why GE tells us to "replace failed bulbs promptly" because the whole string goes into overdrive mode if LEDs fail shorted. If they fail open, the whole string goes dark and no current flows.
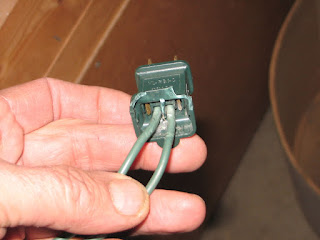
Terry found that the Philips LED string contains a small fuse in the plug end. If the fuse blew, the string would not light. Do I have a fuse? No mention of a fuse in the GE pamphlet. I attempted to find such a fuse and went so far as to destroy the stacking plug end of one of my rejected strings. I think I can say with authority that there is no fuse in the GE unit. Maybe where Terry is, they need to have a fuse? You should eliminate that possibility, that you have a fuse. Sometimes the "fuse" is thermal and permanently cuts the circuit. Something like that would be in the canister, with the resistors.
Terry talks about failed LEDs being dark and easy to spot, so obviously he saw lots of the failed short type. Not here. Terry wrote in 2007 so perhaps the LEDs are different now. He uses LEDs of different colors whereas mine are all white.
Terry also mulls the lack of a blocking diode in the Philips string and suggests that manufacturers add a blocking diode to better protect the LEDs from reverse transient voltages and it seems that GE listened to his advice and added such a reverse blocking diode in the canister.
Finally, Terry points out that running LEDs from AC means that the LEDs are only on for a part of the time leading to a flicking effect.
I attached a current meter to one of the wires in the GE LED string and displayed the results on an oscilloscope to show what Terry is describing.
The green oscilloscope trace shows that most of the time (the flat part of the trace), the LED is OFF and for about 1/3 of the time, 60 times a second, the LED string conducts hard, up to about 44 mA maximum and then goes off again. 44mA is a lot of current for an LED of this size which would normally run at between 10-20 mA current if it was continuous or DC current. I suspect that the string would appear much brighter yet use the same cost of electricity if the string was operated from DC rather than AC.
I will look at that possibility in a future article.
Fixing the LED sockets
The main failure mechanism I had to deal with was rust in the sockets (rust is an insulator) and deteriorated LED leads.
The LEDs with deteriorated leads (any sign of rust at all) were discarded and replaced. Fortunately GE had supplied a number of spare bulbs (about six) with each string. Working ones from the scrapped strings provided more spare bulbs and caps.
The sockets were cleaned in the following way. I found that it was possible to separate the sockets into two parts by pushing out the inner section with a small blunt tool. You can lay the socket with its open face flat on a surface and push hard on the center, between the wires, to free it up. Then if you pick the socket up and push, the center portion should just come right out.
This picture is a bit ugly with the socket guts covered with Vaseline, the dielectric grease I had handy. This socket was particularly badly coated with rust and the LED leads had completely disintegrated so it is the one I wanted to show you.
It is interesting that in any galvanic pair of metals, it is one metal that corrodes and the other is fine (more about galvanic corrosion). In the case of these sockets, the LED lead suffers but the contacts are ok except that they are coated with rust. With the socket disassembled it is very easy to get at the top edge of the connector to clean it up. This one has been together for a while potted in Vaseline which seems to be lifting the rust residue which is fine, both the Vaseline and the rust are insulators. The point of the Vaseline is to keep water and oxygen away from the LED lead and the place it touches the conductor in the socket. You can see the bright metal edge on the socket conductor where I have scrubbed it with a small screwdriver to clean up the edge. It is only these top edges that touch the LED leads, you don't need to worry about cleaning up anything else. To re-seat the contacts, just push them back into the socket. They will click into place. The Vaseline helps to seal the joint where the wires enter the socket also.
Finally, I ran a bead of Vaseline around the base of the cap before inserting it into the socket. This improves the lubrication so the cap is hopefully easier to remove next time and the film of Vaseline would help to seal the joint between the cap and the socket, helping to keep out the water.
Hopefully these lights will continue to give good service for years to come.
Your comments are welcome. Thanks for your interest and good luck with your LED light strings.
George Plhak
Lion's Head, Ontario, Canada
**NEW** Mar 12 2020 Please see the Addendum for some updates and new pictures.
Apr 2019 - I wondered about the recent web traffic here from MIT (Massachusetts Institute of Technology). Welcome MIT students!
You might also be interested in my series on
a very bright 1 watt diy led garden light


